Overview
AnswerHub’s outgoing email system can be configured to notify users of new activity in their community on their AnswerHub site. Note that the outgoing email should not be your personal email. You should have your IT department create a dedicated email address for you to use as your outgoing email address for your AnswerHub Community.
Information
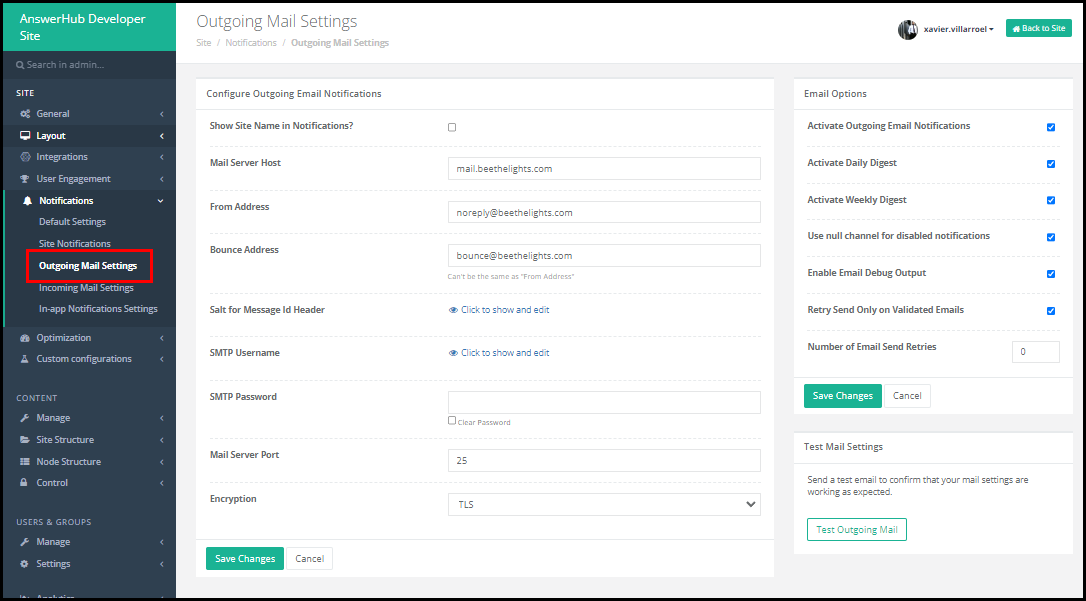
All emails are sent from your own email server. You can access the Outgoing Mail Settings option from the Site tab of the Administrator Dashboard by selecting Outgoing Mail Settings from the Notifications menu of the Navigation sidebar.
To edit outgoing mail settings, follow these steps:
- From the Site tab of the Administrator Dashboard, select Outgoing Mail Settings from the Summary menu of the Navigation sidebar.
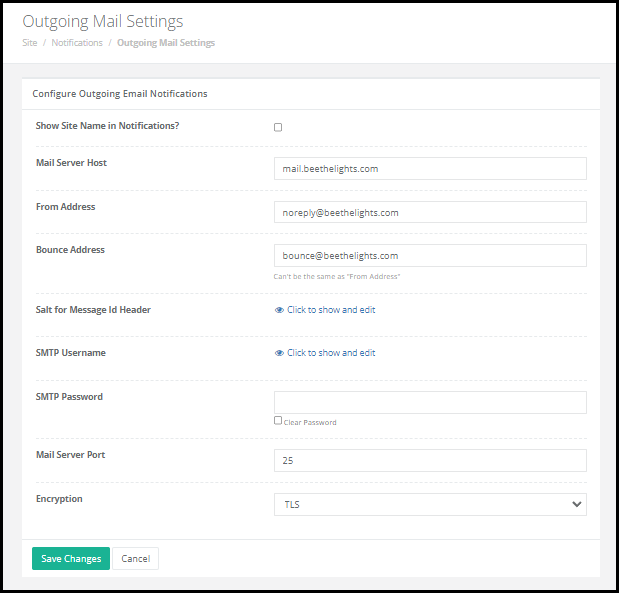
The Edit Outgoing Mail Settings pane is displayed.
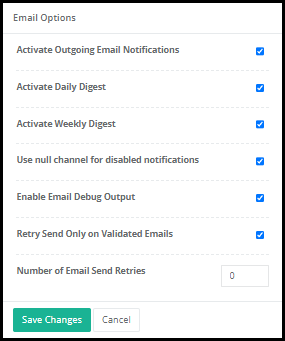
- Select the checkboxes that apply to your notification settings:
- Activate Outgoing Email Notifications: Users will start receiving notifications.
- Activate Daily Digest: Notifications will be sent in a daily digest.
- Activate Weekly Digest: Notifications will be sent in a weekly digest.
- Use null channel for disabled notifications:
- Enable Email Debug Output: Select to enable email to debug output.
- Retry Send Only on Validated Emails:
- Number of Email Send Retries: Number of times an email will try to be sent
- Enter the required email information in the following fields:
-
Mail Server Host: The URL of the server hosting your email address.
-
From Address: The email address your outgoing emails will be from.
-
Bounce Address: The email addresses your bounced emails will be from.
Your Bounce Address cannot be the same as the From Address. -
Salt for Message ID Header: A randomly generated string used for encryption.
The Salt Message ID Header field is randomly generated. If this is changed, all previously sent email notifications will no longer be able to be mapped to the correct one. -
SMTP Username: The username connected to your email account.
-
SMTP Password: The password is connected to your email address.
Verify that your SMTP credentials match your mail server host credentials. - Clear Password checkbox: To clear the previously saved password
- Mail Server Port: enter the mail server port that is open on your email server.
- Encryption: drop-down menu and select from the following encryption types for your outgoing mail (None, SSL, or TLS).
-
- Click the Save button.
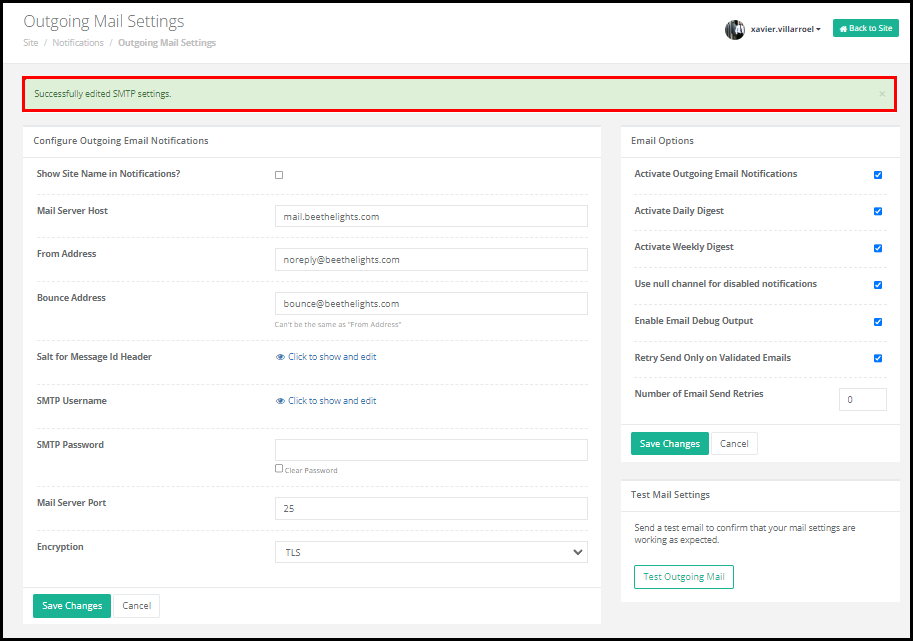
A green bar that reads Successfully edited SMTP settings. is displayed at the top of the Edit Outgoing Mail Settings pane.
To set what default notifications users receive, go to Users & Groups on your Administrator Dashboard, and under User, Settings select Default Notifications.


Priyanka Bhotika
Comments